


Overview
KubeDB is the Kubernetes Native Database Management Solution which simplifies and automates routine database tasks such as Provisioning, Monitoring, Upgrading, Patching, Scaling, Volume Expansion, Backup, Recovery, Failure detection, and Repair for various popular databases on private and public clouds. The databases supported by KubeDB include MongoDB, Elasticsearch, MySQL, MariaDB, Redis, PostgreSQL, Percona XtraDB, and Memcached. Additionally, KubeDB also supports ProxySQL, PgBouncer, and the streaming platform Kafka. You can find the guides to all the supported databases in KubeDB . KubeDB provides support not only for the official Elasticsearch by Elastic and OpenSearch by AWS, but also other open source distributions like SearchGuard and OpenDistro . KubeDB provides all of these distribution’s support under the Elasticsearch CR of KubeDB. In this tutorial we will deploy Elasticsearch Hot-Warm-Cold Cluster in Google Kubernetes Engine (GKE). We will cover the following steps:
- Install KubeDB
- Deploy Elasticsearch Hot-Warm-Cold Cluster
- Verify Node Role
- Read/Write Sample Data
Elasticsearch Hot-Warm-Cold Cluster
Hot-warm-cold architectures are common for time series data such as logging or metrics and it also has various use cases too. For example, assume Elasticsearch is being used to aggregate log files from multiple systems. Logs from today are actively being indexed and this week’s logs are the most heavily searched (hot). Last week’s logs may be searched but not as much as the current week’s logs (warm). Last month’s logs may or may not be searched often, but are good to keep around just in case (cold).
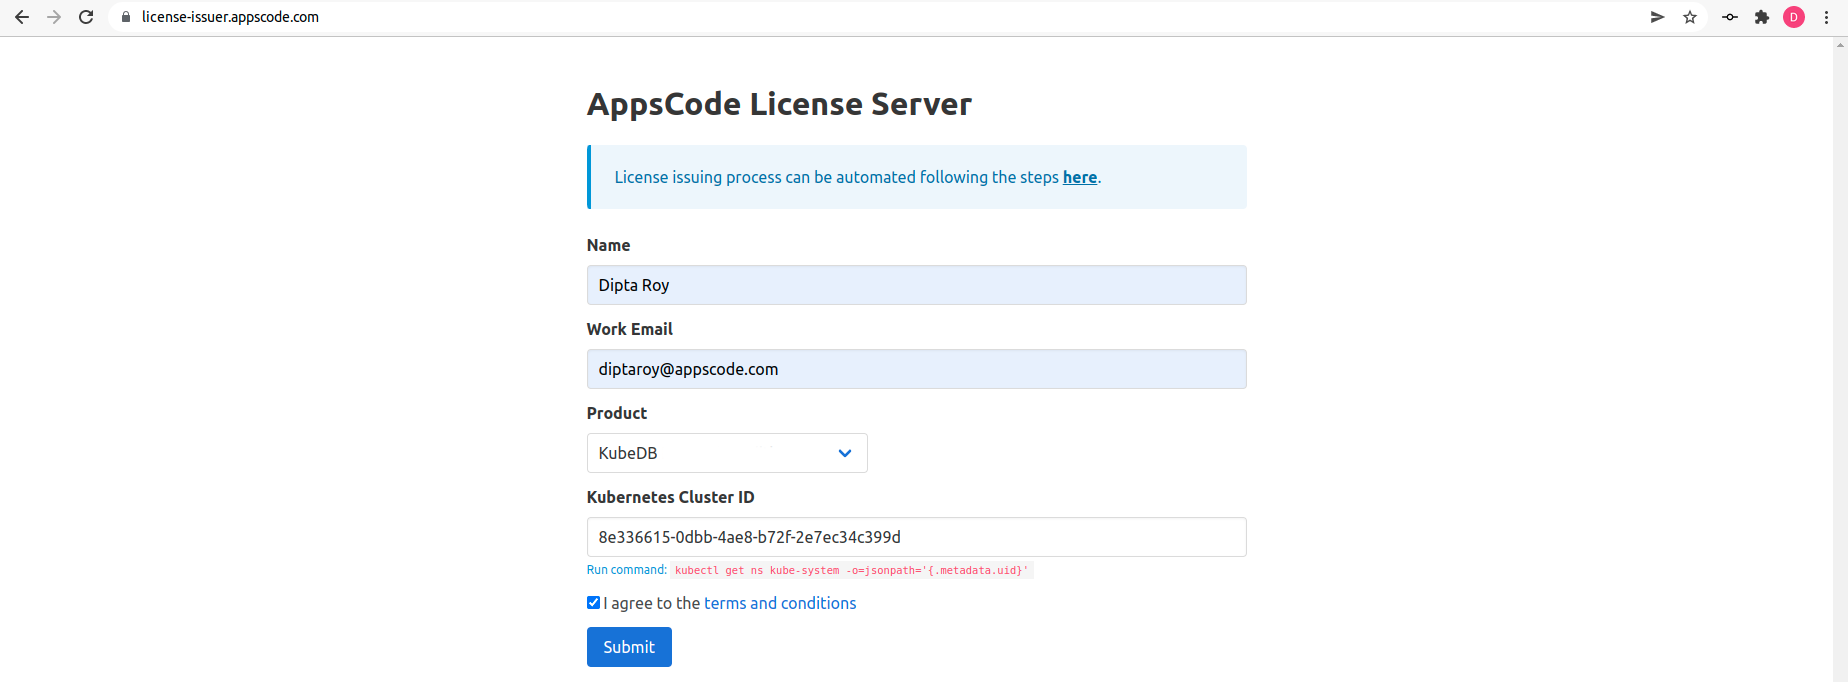
Get Cluster ID
We need the cluster ID to get the KubeDB License. To get cluster ID, we can run the following command:
$ kubectl get ns kube-system -o jsonpath='{.metadata.uid}'
8e336615-0dbb-4ae8-b72f-2e7ec34c399d
Get License
Go to Appscode License Server to get the license.txt file. For this tutorial we will use KubeDB.
Install KubeDB
We will use helm to install KubeDB. Please install helm
, if it is not already installed.
Now, let’s install KubeDB.
$ helm search repo appscode/kubedb
NAME                              	CHART VERSION	APP VERSION	DESCRIPTION
appscode/kubedb                   	v2023.12.28  	v2023.12.28	KubeDB by AppsCode - Production ready databases...
appscode/kubedb-autoscaler        	v0.25.0      	v0.25.0    	KubeDB Autoscaler by AppsCode - Autoscale KubeD...
appscode/kubedb-catalog           	v2023.12.28  	v2023.12.28	KubeDB Catalog by AppsCode - Catalog for databa...
appscode/kubedb-community         	v0.24.2      	v0.24.2    	KubeDB Community by AppsCode - Community featur...
appscode/kubedb-crds              	v2023.12.28  	v2023.12.28	KubeDB Custom Resource Definitions
appscode/kubedb-dashboard         	v0.16.0      	v0.16.0    	KubeDB Dashboard by AppsCode
appscode/kubedb-enterprise        	v0.11.2      	v0.11.2    	KubeDB Enterprise by AppsCode - Enterprise feat...
appscode/kubedb-grafana-dashboards	v2023.12.28  	v2023.12.28	A Helm chart for kubedb-grafana-dashboards by A...
appscode/kubedb-kubestash-catalog 	v2023.12.28  	v2023.12.28	KubeStash Catalog by AppsCode - Catalog of Kube...
appscode/kubedb-metrics           	v2023.12.28  	v2023.12.28	KubeDB State Metrics
appscode/kubedb-one               	v2023.12.28  	v2023.12.28	KubeDB and Stash by AppsCode - Production ready...
appscode/kubedb-ops-manager       	v0.27.0      	v0.27.0    	KubeDB Ops Manager by AppsCode - Enterprise fea...
appscode/kubedb-opscenter         	v2023.12.28  	v2023.12.28	KubeDB Opscenter by AppsCode
appscode/kubedb-provider-aws      	v2023.12.28  	v0.2.0     	A Helm chart for KubeDB AWS Provider for Crossp...
appscode/kubedb-provider-azure    	v2023.12.28  	v0.2.0     	A Helm chart for KubeDB Azure Provider for Cros...
appscode/kubedb-provider-gcp      	v2023.12.28  	v0.2.0     	A Helm chart for KubeDB GCP Provider for Crossp...
appscode/kubedb-provisioner       	v0.40.0      	v0.40.0    	KubeDB Provisioner by AppsCode - Community feat...
appscode/kubedb-schema-manager    	v0.16.0      	v0.16.0    	KubeDB Schema Manager by AppsCode
appscode/kubedb-ui                	v2023.12.20  	0.6.1      	A Helm chart for Kubernetes
appscode/kubedb-ui-server         	v2021.12.21  	v2021.12.21	A Helm chart for kubedb-ui-server by AppsCode
appscode/kubedb-webhook-server    	v0.16.0      	v0.16.0    	KubeDB Webhook Server by AppsCode

$ helm install kubedb oci://ghcr.io/appscode-charts/kubedb \
  --version v2023.12.28 \
  --namespace kubedb --create-namespace \
  --set-file global.license=/path/to/the/license.txt \
  --wait --burst-limit=10000 --debug
Let’s verify the installation:
$ kubectl get pods --all-namespaces -l "app.kubernetes.io/instance=kubedb"
NAMESPACE   NAME                                           READY   STATUS    RESTARTS        AGE
kubedb      kubedb-kubedb-autoscaler-6d6ffb847c-bpb9c      1/1     Running   0               5m
kubedb      kubedb-kubedb-dashboard-65cd5f6ddf-l72vc       1/1     Running   0               5m
kubedb      kubedb-kubedb-ops-manager-9665f8666-2qnbb      1/1     Running   0               5m
kubedb      kubedb-kubedb-provisioner-7984979d86-xphhz     1/1     Running   0               5m
kubedb      kubedb-kubedb-webhook-server-95989684b-jdsj4   1/1     Running   0               5m
We can list the CRD Groups that have been registered by the operator by running the following command:
$ kubectl get crd -l app.kubernetes.io/name=kubedb
NAME                                              CREATED AT
elasticsearchautoscalers.autoscaling.kubedb.com   2024-01-03T06:42:20Z
elasticsearchdashboards.dashboard.kubedb.com      2024-01-03T06:42:21Z
elasticsearches.kubedb.com                        2024-01-03T06:42:22Z
elasticsearchopsrequests.ops.kubedb.com           2024-01-03T06:42:36Z
elasticsearchversions.catalog.kubedb.com          2024-01-03T06:40:37Z
etcds.kubedb.com                                  2024-01-03T06:42:33Z
etcdversions.catalog.kubedb.com                   2024-01-03T06:40:37Z
kafkaopsrequests.ops.kubedb.com                   2024-01-03T06:43:38Z
kafkas.kubedb.com                                 2024-01-03T06:42:47Z
kafkaversions.catalog.kubedb.com                  2024-01-03T06:40:38Z
mariadbautoscalers.autoscaling.kubedb.com         2024-01-03T06:42:20Z
mariadbopsrequests.ops.kubedb.com                 2024-01-03T06:43:15Z
mariadbs.kubedb.com                               2024-01-03T06:42:34Z
mariadbversions.catalog.kubedb.com                2024-01-03T06:40:38Z
memcacheds.kubedb.com                             2024-01-03T06:42:35Z
memcachedversions.catalog.kubedb.com              2024-01-03T06:40:38Z
mongodbarchivers.archiver.kubedb.com              2024-01-03T06:42:49Z
mongodbautoscalers.autoscaling.kubedb.com         2024-01-03T06:42:20Z
mongodbopsrequests.ops.kubedb.com                 2024-01-03T06:42:41Z
mongodbs.kubedb.com                               2024-01-03T06:42:37Z
mongodbversions.catalog.kubedb.com                2024-01-03T06:40:39Z
mysqlarchivers.archiver.kubedb.com                2024-01-03T06:42:52Z
mysqlautoscalers.autoscaling.kubedb.com           2024-01-03T06:42:20Z
mysqlopsrequests.ops.kubedb.com                   2024-01-03T06:43:11Z
mysqls.kubedb.com                                 2024-01-03T06:42:40Z
mysqlversions.catalog.kubedb.com                  2024-01-03T06:40:39Z
perconaxtradbautoscalers.autoscaling.kubedb.com   2024-01-03T06:42:20Z
perconaxtradbopsrequests.ops.kubedb.com           2024-01-03T06:43:31Z
perconaxtradbs.kubedb.com                         2024-01-03T06:42:41Z
perconaxtradbversions.catalog.kubedb.com          2024-01-03T06:40:39Z
pgbouncers.kubedb.com                             2024-01-03T06:42:42Z
pgbouncerversions.catalog.kubedb.com              2024-01-03T06:40:40Z
postgresarchivers.archiver.kubedb.com             2024-01-03T06:42:55Z
postgresautoscalers.autoscaling.kubedb.com        2024-01-03T06:42:20Z
postgreses.kubedb.com                             2024-01-03T06:42:43Z
postgresopsrequests.ops.kubedb.com                2024-01-03T06:43:24Z
postgresversions.catalog.kubedb.com               2024-01-03T06:40:40Z
proxysqlautoscalers.autoscaling.kubedb.com        2024-01-03T06:42:20Z
proxysqlopsrequests.ops.kubedb.com                2024-01-03T06:43:27Z
proxysqls.kubedb.com                              2024-01-03T06:42:44Z
proxysqlversions.catalog.kubedb.com               2024-01-03T06:40:40Z
publishers.postgres.kubedb.com                    2024-01-03T06:43:41Z
redisautoscalers.autoscaling.kubedb.com           2024-01-03T06:42:21Z
redises.kubedb.com                                2024-01-03T06:42:45Z
redisopsrequests.ops.kubedb.com                   2024-01-03T06:43:18Z
redissentinelautoscalers.autoscaling.kubedb.com   2024-01-03T06:42:22Z
redissentinelopsrequests.ops.kubedb.com           2024-01-03T06:43:34Z
redissentinels.kubedb.com                         2024-01-03T06:42:46Z
redisversions.catalog.kubedb.com                  2024-01-03T06:40:41Z
subscribers.postgres.kubedb.com                   2024-01-03T06:43:45Z
Deploy Elasticsearch Hot-Warm-Cold Cluster
Now, We are going to use the KubeDB-provided Custom Resource object Elasticsearch for deployment. First, let’s create a Namespace in which we will deploy the cluster.
$ kubectl create namespace demo
namespace/demo created
Here is the yaml of the Elasticsearch we are going to use:
apiVersion: kubedb.com/v1alpha2
kind: Elasticsearch
metadata:
  name: es-hwc-cluster
  namespace: demo
spec:
  enableSSL: true
  version: xpack-8.11.1
  topology:
      master:
        replicas: 2
        storage:
          resources:
            requests:
              storage: 1Gi
          storageClassName: "standard"
      ingest:
        replicas: 2
        storage:
          resources:
            requests:
              storage: 1Gi
          storageClassName: "standard"
      dataContent:
        replicas: 1
        storage:
          resources:
            requests:
              storage: 1Gi
          storageClassName: "standard"
      dataHot:
        replicas: 3
        storage:
          resources:
            requests:
              storage: 1Gi
          storageClassName: "standard"
      dataWarm:
        replicas: 2
        storage:
          resources:
            requests:
              storage: 1Gi
          storageClassName: "standard"
      dataCold:
        replicas: 2
        storage:
          resources:
            requests:
              storage: 1Gi
          storageClassName: "standard"
Let’s save this yaml configuration into es-hwc-cluster.yaml
Then apply the above Elasticsearch yaml,
$ kubectl apply -f es-hwc-cluster.yaml
elasticsearch.kubedb.com/es-hwc-cluster created
In this yaml,
spec.versionfield specifies the version of Elasticsearch. Here, we are using Elasticsearch versionxpack-8.11.1which is used to provisionElasticsearch-8.11.1with xpack auth plugin. You can list the KubeDB supported versions of Elasticsearch CR withx-packauth-plugin by running$ kubectl get elasticsearchversions | grep xpackcommand. If you want to get other distributions, usegrepcommand accordingly.spec.storagespecifies PVC spec that will be dynamically allocated to store data for this database. This storage spec will be passed to the StatefulSet created by KubeDB operator to run database pods. You can specify any StorageClass available in your cluster with appropriate resource requests. You can get all the availablestorageclassin your cluster by running$ kubectl get storageclasscommand.spec.enableSSL- specifies whether the HTTP layer is secured with certificates or not.spec.storageType- specifies the type of storage that will be used for Elasticsearch database. It can beDurableorEphemeral. The default value of this field isDurable. IfEphemeralis used then KubeDB will create the Elasticsearch database usingEmptyDirvolume. In this case, you don’t have to specifyspec.storagefield. This is useful for testing purposes.spec.topology- specifies the node-specific properties for the Elasticsearch cluster.topology.master- specifies the properties of master nodes.master.replicas- specifies the number of master nodes.master.storage- specifies the master node storage information that passed to the StatefulSet.
topology.data- specifies the properties of data nodes.data.replicas- specifies the number of data nodes.data.storage- specifies the data node storage information that passed to the StatefulSet.
topology.ingest- specifies the properties of ingest nodes.ingest.replicas- specifies the number of ingest nodes.ingest.storage- specifies the ingest node storage information that passed to the StatefulSet.
You can see the detailed yaml specifications in the Kubernetes Elasticsearch documentation.
Once these are handled correctly and the Elasticsearch object is deployed, you will see that the following resources are created:
$ kubectl get all -n demo
NAME                                READY   STATUS    RESTARTS   AGE
pod/es-hwc-cluster-data-cold-0      1/1     Running   0          7m
pod/es-hwc-cluster-data-cold-1      1/1     Running   0          7m
pod/es-hwc-cluster-data-content-0   1/1     Running   0          7m
pod/es-hwc-cluster-data-hot-0       1/1     Running   0          7m
pod/es-hwc-cluster-data-hot-1       1/1     Running   0          7m
pod/es-hwc-cluster-data-hot-2       1/1     Running   0          6m
pod/es-hwc-cluster-data-warm-0      1/1     Running   0          7m
pod/es-hwc-cluster-data-warm-1      1/1     Running   0          7m
pod/es-hwc-cluster-ingest-0         1/1     Running   0          7m
pod/es-hwc-cluster-ingest-1         1/1     Running   0          7m
pod/es-hwc-cluster-master-0         1/1     Running   0          7m
pod/es-hwc-cluster-master-1         1/1     Running   0          7m

NAME                            TYPE        CLUSTER-IP    EXTERNAL-IP   PORT(S)    AGE
service/es-hwc-cluster          ClusterIP   10.76.6.162   <none>        9200/TCP   7m
service/es-hwc-cluster-master   ClusterIP   None          <none>        9300/TCP   7m
service/es-hwc-cluster-pods     ClusterIP   None          <none>        9200/TCP   7m

NAME                                           READY   AGE
statefulset.apps/es-hwc-cluster-data-cold      2/2     7m
statefulset.apps/es-hwc-cluster-data-content   1/1     7m
statefulset.apps/es-hwc-cluster-data-hot       3/3     7m
statefulset.apps/es-hwc-cluster-data-warm      2/2     7m
statefulset.apps/es-hwc-cluster-ingest         2/2     7m
statefulset.apps/es-hwc-cluster-master         2/2     7m
Let’s check if the database is ready to use,
$ kubectl get elasticsearch -n demo es-hwc-cluster
NAME             VERSION        STATUS     AGE
es-hwc-cluster   xpack-8.11.1   Ready      7m
We have successfully deployed Elasticsearch in Google Kubernetes Engine (GKE). Now we can exec into the container to use the database.
Connect with Elasticsearch Database
We will use port forwarding
to connect with our Elasticsearch database. Then we will use curl to send HTTP requests to check cluster health to verify that our Elasticsearch database is working well.
Port-forward the Service
KubeDB will create few Services to connect with the database. Let’s check the Services by following command,
$ kubectl get service -n demo
NAME                    TYPE        CLUSTER-IP    EXTERNAL-IP   PORT(S)    AGE
es-hwc-cluster          ClusterIP   10.76.6.162   <none>        9200/TCP   7m
es-hwc-cluster-master   ClusterIP   None          <none>        9300/TCP   7m
es-hwc-cluster-pods     ClusterIP   None          <none>        9200/TCP   7m
Here, we are going to use es-hwc-cluster Service to connect with the database. Now, let’s port-forward the es-hwc-cluster Service to the port 9200 to local machine:
$ kubectl port-forward -n demo svc/es-hwc-cluster 9200
Forwarding from 127.0.0.1:9200 -> 9200
Forwarding from [::1]:9200 -> 9200
Now, our Elasticsearch cluster is accessible at localhost:9200.
Export the Credentials
KubeDB also create some Secrets for the database. Let’s check which Secrets have been created by KubeDB for our es-hwc-cluster.
$ kubectl get secret -n demo | grep es-hwc-cluster
es-hwc-cluster-apm-system-cred               kubernetes.io/basic-auth   2      7m
es-hwc-cluster-beats-system-cred             kubernetes.io/basic-auth   2      7m
es-hwc-cluster-ca-cert                       kubernetes.io/tls          2      7m
es-hwc-cluster-client-cert                   kubernetes.io/tls          3      7m
es-hwc-cluster-config                        Opaque                     1      7m
es-hwc-cluster-elastic-cred                  kubernetes.io/basic-auth   2      7m
es-hwc-cluster-http-cert                     kubernetes.io/tls          3      7m
es-hwc-cluster-kibana-system-cred            kubernetes.io/basic-auth   2      7m
es-hwc-cluster-logstash-system-cred          kubernetes.io/basic-auth   2      7m
es-hwc-cluster-remote-monitoring-user-cred   kubernetes.io/basic-auth   2      7m
es-hwc-cluster-transport-cert                kubernetes.io/tls          3      7m
Now, we can connect to the database with es-hwc-cluster-elastic-cred which contains the admin level credentials to connect with the database.
Accessing Database Through CLI
To access the database through CLI, we have to get the credentials to access. Let’s export the credentials as environment variable to our current shell :
$ kubectl get secret -n demo es-hwc-cluster-elastic-cred -o jsonpath='{.data.username}' | base64 -d
elastic
$ kubectl get secret -n demo es-hwc-cluster-elastic-cred -o jsonpath='{.data.password}' | base64 -d
Ty_Lt4cf5!tx69Hs
Now, let’s check the health of our Elasticsearch cluster
# curl -XGET -k -u 'username:password' https://localhost:9200/_cluster/health?pretty"
$ curl -XGET -k -u 'elastic:Ty_Lt4cf5!tx69Hs' "https://localhost:9200/_cluster/health?pretty"
{
  "cluster_name" : "es-hwc-cluster",
  "status" : "green",
  "timed_out" : false,
  "number_of_nodes" : 12,
  "number_of_data_nodes" : 8,
  "active_primary_shards" : 9,
  "active_shards" : 10,
  "relocating_shards" : 0,
  "initializing_shards" : 0,
  "unassigned_shards" : 0,
  "delayed_unassigned_shards" : 0,
  "number_of_pending_tasks" : 0,
  "number_of_in_flight_fetch" : 0,
  "task_max_waiting_in_queue_millis" : 0,
  "active_shards_percent_as_number" : 100.0
}
Verify Node Role
As we have assigned a dedicated role to each type of node, let’s verify them by following command,
$ curl -XGET -k -u 'elastic:Ty_Lt4cf5!tx69Hs' "https://localhost:9200/_cat/nodes?v"
ip        heap.percent ram.percent cpu load_1m load_5m load_15m node.role master name
10.72.12.3          41          90   3    0.22    0.31     0.34 s         -      es-hwc-cluster-data-content-0
10.72.1.7           70          76   3    0.00    0.03     0.07 h         -      es-hwc-cluster-data-hot-0
10.72.2.8           45          87   4    0.09    0.20     0.26 i         -      es-hwc-cluster-ingest-0
10.72.14.3          33          75   3    0.22    0.31     0.34 w         -      es-hwc-cluster-data-warm-0
10.72.0.8           65          76   3    0.09    0.20     0.26 h         -      es-hwc-cluster-data-hot-1
10.72.10.3          46          75   3    0.09    0.20     0.26 c         -      es-hwc-cluster-data-cold-1
10.72.6.9           56          77   3    0.00    0.03     0.07 m         *      es-hwc-cluster-master-0
10.72.7.8           52          74   3    0.02    0.06     0.11 c         -      es-hwc-cluster-data-cold-0
10.72.9.4           34          75   3    0.22    0.31     0.34 m         -      es-hwc-cluster-master-1
10.72.8.8           21          74   3    0.00    0.03     0.07 w         -      es-hwc-cluster-data-warm-1
10.72.11.4          23          85   3    0.02    0.06     0.11 i         -      es-hwc-cluster-ingest-1
10.72.3.7           72          75   3    0.02    0.06     0.11 h         -      es-hwc-cluster-data-hot-2
node.rolefield specifies the dedicated role that we have assigned for each type of node. Wherehrefers to the hot node,wrefers to the warm node,crefers to the cold node,irefers to the ingest node,mrefers to the master node, andsrefers to the content node.masterfield specifies the active master node. Here, we can see a*in thees-hwc-cluster-master-0which shows that it is the active master node now.
Insert Sample Data
In this section, we are going to create few indexes in Elasticsearch. You can use curl for post some sample data into Elasticsearch. Use the -k flag to disable attempts to verify self-signed certificates for testing purposes.:
$ curl -XPOST -k --user 'elastic:Ty_Lt4cf5!tx69Hs' "https://localhost:9200/music/_doc?pretty" -H 'Content-Type: application/json' -d'
                  {
                      "Artist": "John Denver",
                      "Song": "Country Roads"
                  }
                  '
{
  "_index" : "music",
  "_id" : "oJ2V8owBPBcRbMvr6g17",
  "_version" : 1,
  "result" : "created",
  "_shards" : {
    "total" : 2,
    "successful" : 1,
    "failed" : 0
  },
  "_seq_no" : 0,
  "_primary_term" : 1
}
Now, let’s verify that the index has been created successfully.
$ curl -XGET -k --user 'elastic:Ty_Lt4cf5!tx69Hs' "https://localhost:9200/_cat/indices?v&s=index&pretty"
health status index         uuid                   pri rep docs.count docs.deleted store.size pri.store.size dataset.size
green  open   kubedb-system 1mk1HsiGTKiqay6By84SGQ   1   1          1            6    500.4kb        500.4kb      500.4kb
green  open   music         CxQqbq9NTmmTesIsLqJR5Q   1   1          1            0      5.4kb          5.4kb        5.4kb
Also, let’s verify the data in the indexes:
$ curl -XGET -k --user 'elastic:Ty_Lt4cf5!tx69Hs' "https://localhost:9200/music/_search?pretty"
{
  "took" : 11,
  "timed_out" : false,
  "_shards" : {
    "total" : 1,
    "successful" : 1,
    "skipped" : 0,
    "failed" : 0
  },
  "hits" : {
    "total" : {
      "value" : 1,
      "relation" : "eq"
    },
    "max_score" : 1.0,
    "hits" : [
      {
        "_index" : "music",
        "_id" : "oJ2V8owBPBcRbMvr6g17",
        "_score" : 1.0,
        "_source" : {
          "Artist" : "John Denver",
          "Song" : "Country Roads"
        }
      }
    ]
  }
}
We’ve successfully inserted some sample data to our Elasticsearch database. More information about Deploy & Manage Production-Grade Elasticsearch Database on Kubernetes can be found in Elasticsearch Kubernetes
We have made a tutorial on Provision Elasticsearch Multi-node Combined cluster and Topology Cluster using KubeDB. You can have a look into the video below:
Support
To speak with us, please leave a message on our website .
To receive product announcements, follow us on Twitter/X .
To watch tutorials of various Production-Grade Kubernetes Tools Subscribe our YouTube channel.
More about Elasticsearch on Kubernetes
If you have found a bug with KubeDB or want to request for new features, please file an issue .